Published on June 11, 2024
Starting of chicks: temperature and light
In this article, we will focus on two key factors in the starting of chicks: temperature and light. These are crucial to ensure that chicks are active from the moment they arrive, and are able to start drinking and feeding properly.
A- Temperature
Temperature is a parameter that is more difficult to control than it appears. There are several temperature values depending on the distance from the heat sources (such as radiant heaters) and the height of the air (which rises when it is hot). Ventilation also influences temperature. Some farmers regulate the temperature in the entire building, others in the area limited to starting pens (via mobile partitions like tarpaulins). Furthermore, the chick's need for heat changes during its development.
Before 10 days or so the chick regulates its own temperature very badly. Its body temperature is initially about 39 to 40°C (it will increase again by one or two degrees afterwards). If the environment is too cold, it must draw from its vitelline reserves and the feed to warm itself, whereas these resources should mainly serve the development of its immune system and its weight (skeleton, organs, muscles). If the environment is too hot the chick will reduce its feed consumption and so delay its growth. So it is necessary to be able to put in place suitable temperature conditions and be capable of adapting them over time.
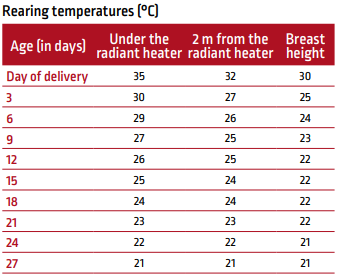
Figure 69: The chick's body temperature changes from day to day, so it is important to adjust the temperature provided by the heaters. Remember to check it in at least three places.
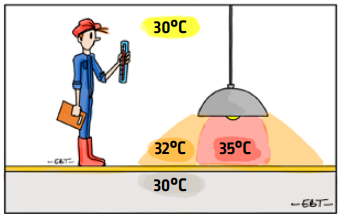
Figure 70: An overhead radiant heater does not radiate heat like a radiant heater close to the floor. Beware of temperature variations.
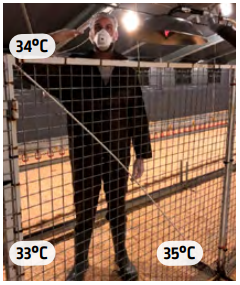
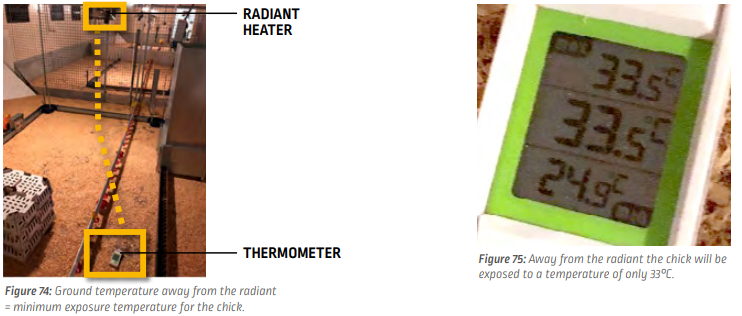
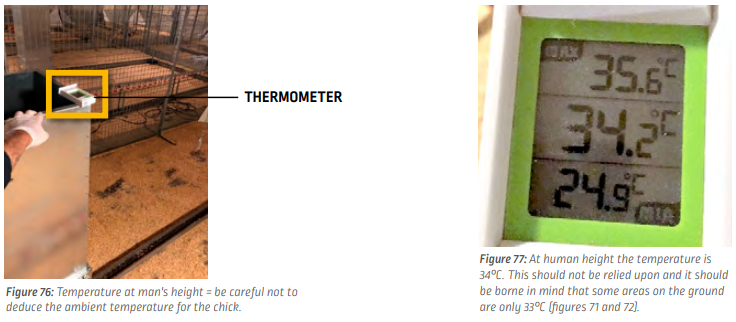
Figure 71: It is important to understand that with a radiant heating system the temperature is not uniform throughout the building. The most important one is the one located at litter level, as this is the living area of the chicks.
It should be remembered that hot air rises and it is therefore possible to have a building that is colder on the floor than at the farmer’s height.
Ambient temperature objectives 5 to 6 hours before the arrival of the chicks.
- farmer’s living area: 28 to 30°C,
- chicks’ living area: 32 to 35°C.
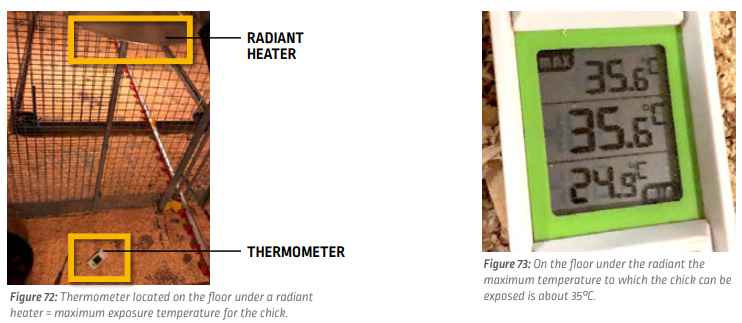
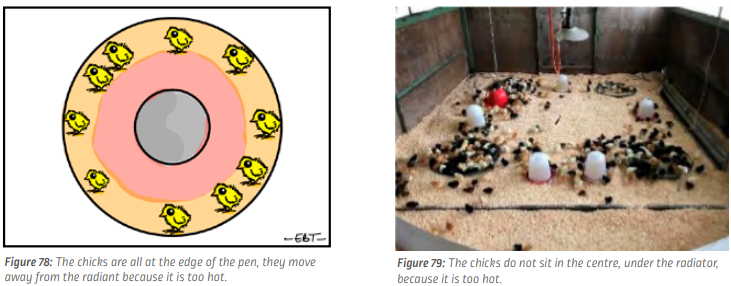
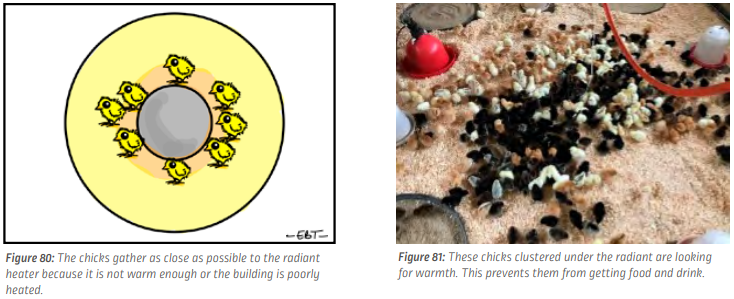
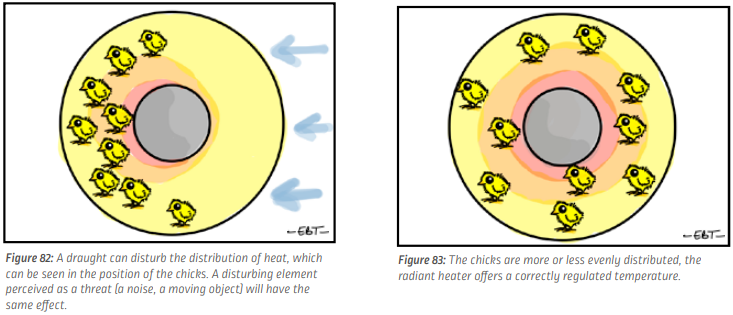
The use of radiant heaters enables the chick to choose an area that is neither too hot nor too cold. The position of the chicks in the starting zone may indicate a heat excess or deficit.
Ventilation is important before installation (removal of volatile disinfection products and combustion gases). During starting, it is also necessary to make sure the air remains pure.
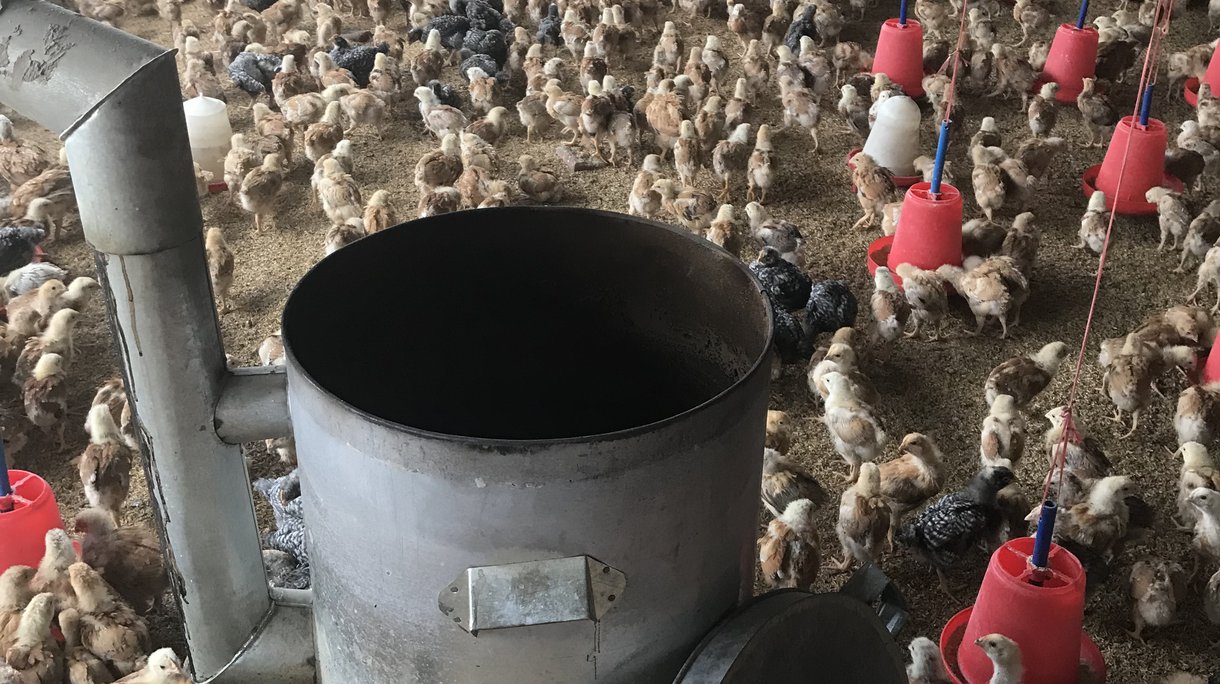
Figure 84: With rudimentary heaters, particular attention must be paid to the distribution of heat by accurately measuring the temperature and observing the behaviour of the animals. Beware also of combustion gases which can affect the air quality, it is important to ventilate or install a chimney!
FOOT TEST
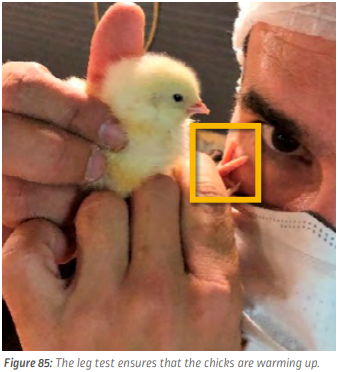
The chick must be at a temperature of about 39-40°C. If the chick does not warm up sufficiently, its feet will be cold and you will feel it by placing the foot pads on your cheek. After 3 hours of starting, perform several tests of this type to assess the condition of the chicks.
B- Light
At starting, the light intensity must be maximal (about 90 lux) so that the chicks are active and can easily find the water and feed points. It is important for the chicks to be able to stimulate each other by interactions. The light must be well distributed so that there are no dark spots.
Above all, do not use blue light which will have the tendency to make the chicks inactive. At the end of 24 hours the light intensity is reduced to reach the rearing intensity progressively. If behaviour is satisfactory (good activity) it is possible to reduce from 12 h of light.
Observation point
It is always awkward to give recommendations d’observation in lux to be reached to adjust the light intensity. In fact, the position of the light meter in relation to the light source and its orientation are parameters that may change the values obtained a lot.

On the first day the light is cut off for 1h in order to let the chicks to rest a little and to learn that the light goes on and off.
After that, each day one hour of night is added to reach 5h of night on the 5th day (refer to the light programme provided at the end of this guide).
If you have any questions, please contact our Technical Support Manager, Alba Mesas, via email: alba.mesas@hendrix-genetics.com

